Feeling like you’re running out of space in your current home? Need a place for the kids (or adults) to play? What about a gym, home theater or wine room? Maybe all three? For many homeowners, the basement is the final frontier. It’s often cluttered, unfinished, and the home of daunting mechanical equipment that can make envisioning the space as livable very difficult. As always, we’re here with lots of tips and ideas for you to consider whether it’s sprucing up a half-finished space, or a large scale basement finishing!
Space Planning
Ok, so you’ve got a large empty space and lots of ideas, where to start?! This is definitely where having a designer or architect can be helpful in seeing what’s possible and what makes sense. Think of all the most important priorities you have for using the space, and don’t forget about the practical things, like storage. If you have a door that leads out to a pool or other area of the backyard, would it be helpful to have a bathroom or mudroom/changing area near that door? Do you want recreational space for kids, or a workout space for adults? Depending on the size of your basement, or how much space you’d like to dedicate to these different activities, you might have different zones, or just focus on one type of space.
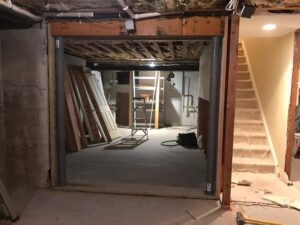
 Take stock of the different types of mechanical equipment and where it is located. If it’s tucked up against a wall, it can easily be closed off and have an access door. If it’s more central, it could be used as a way to partition the rest of the basement into different zones. Most basements have relatively low ceilings, and lots of different mechanical components. There will likely be parts of the ceiling that need to be lowered to accommodate for HVAC. Often trying to find a way to consolidate and organize your ceiling on different planes of height can help clean up the space visually and might also be a good place to start when mapping out the space (more on this in a bit!) Don’t forget to keep in mind ceiling heights when planning your space. You don’t want a cue stick poking through the ceiling.
In this basement project we remodeled in Greenwich, CT the clients wanted to have several different spaces. An area for kids to play musical instruments, a home theater complete with a karaoke machine, as well as a wine cellar and small wet bar for the adults to enjoy. Using different flooring finishes and working with the shape of the basement we were able to create different spaces.
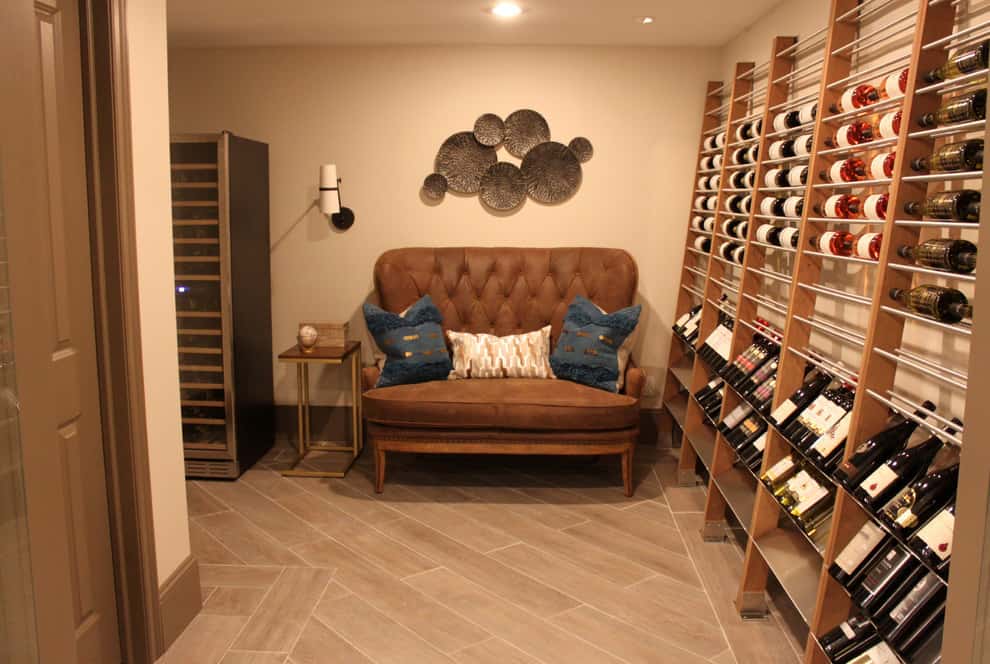
We closed off a small space adjacent to where all their A/V equipment was stored and created a cozy nook for wine storage and a small settee to enjoy a glass of wine.
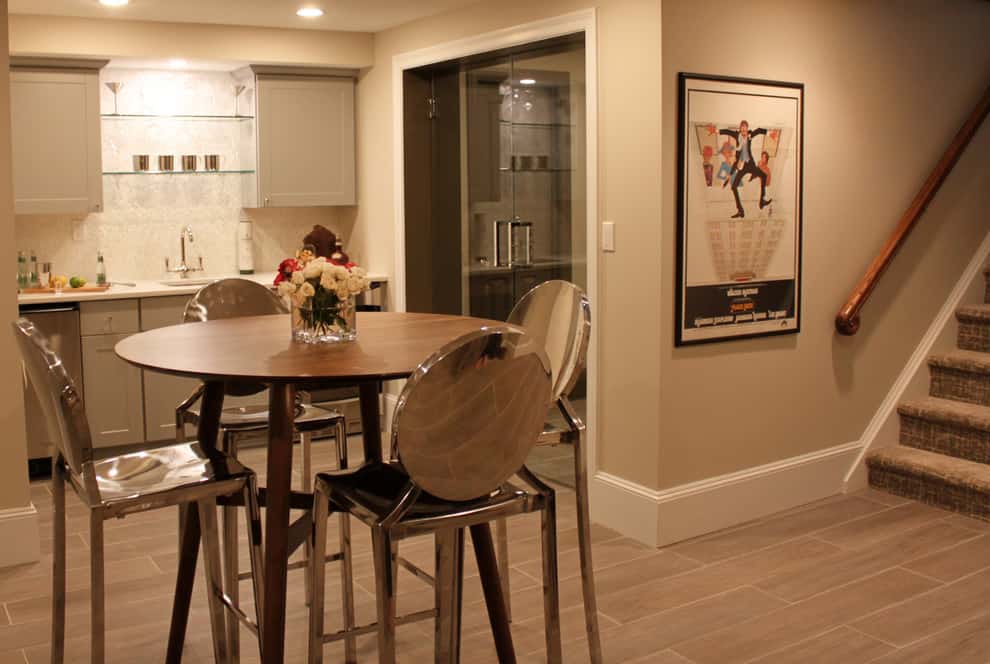
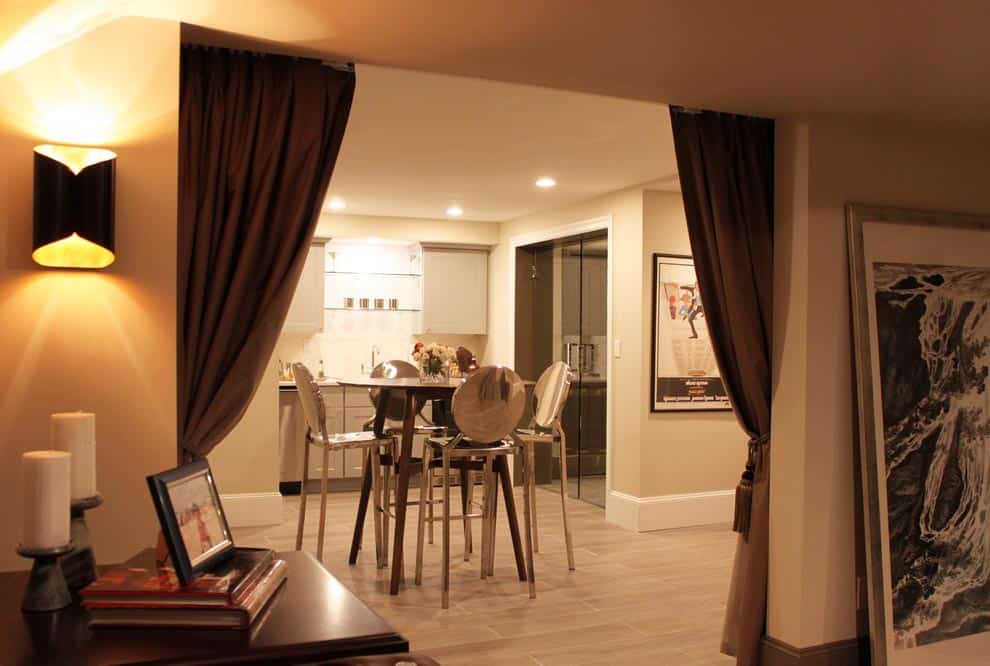
The wine area was adjacent to the wet bar and another small seating/dining area as you walked down the stairs.
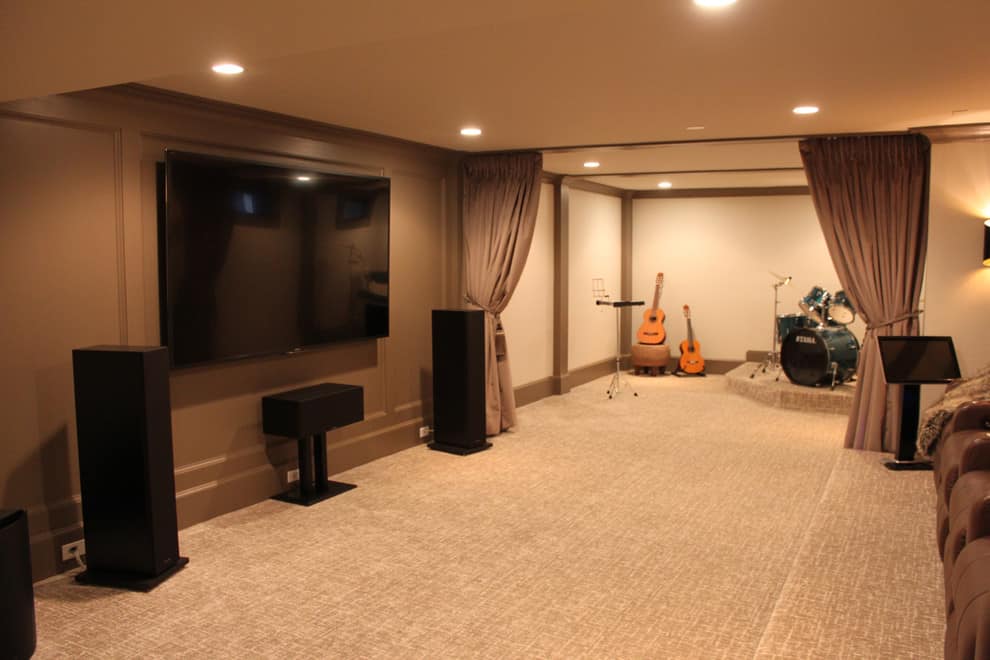
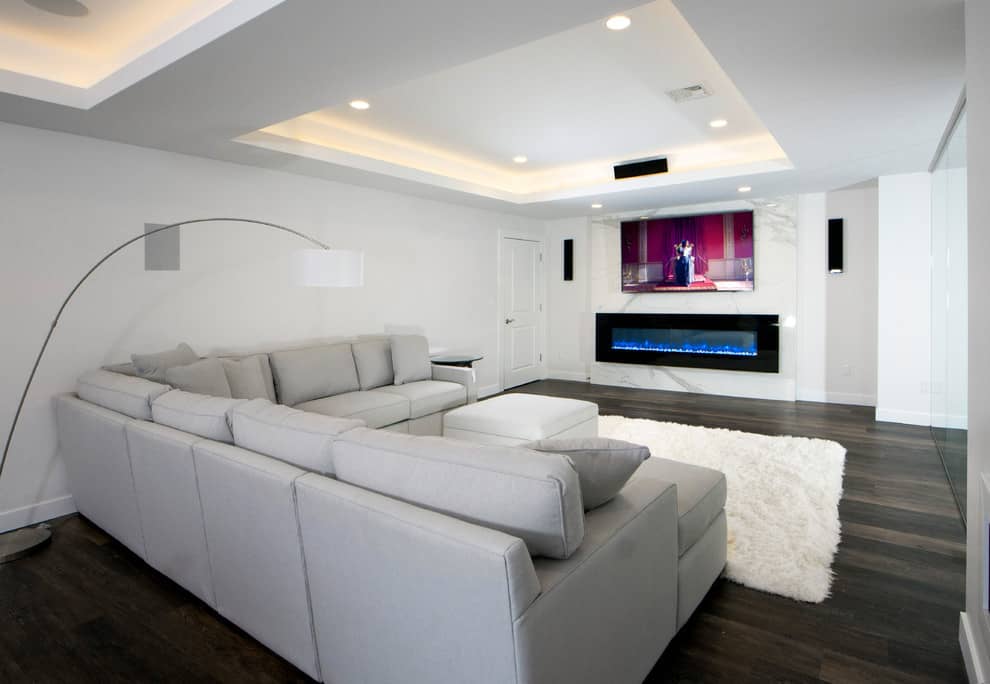
A long rectangular space was carpeted and sectioned off with heavy velvet drapes with blackout lining. This way the theater space could be closed off and enclosed from the kids’ music area but the drapes also framed the spaces visually and added to the idea of a theater and stage.
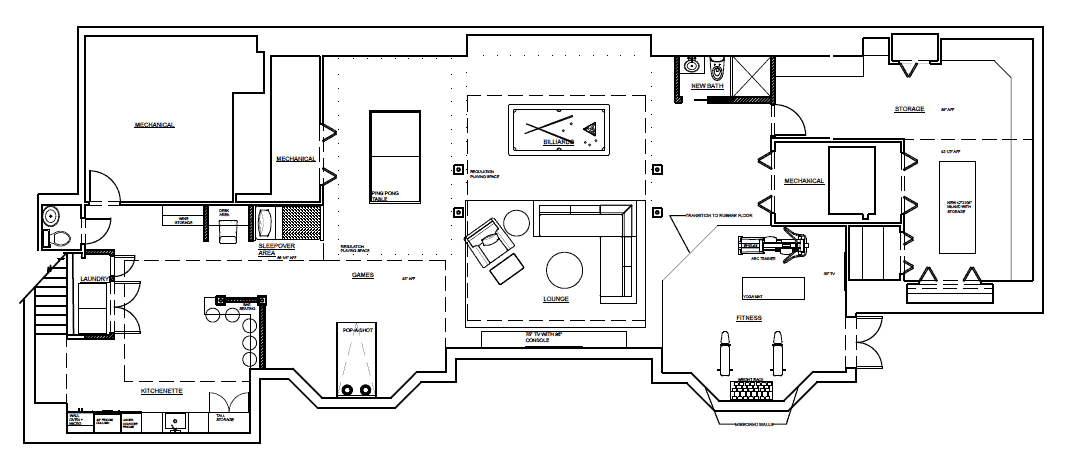
If you’re looking to create a gaming space, make sure you select the right size and scale for the area, and account for play space! Billiards and ping pong tables come in different sizes, and have different suggested areas of clear space around the table to allow for people to move around and play.
4 Ways to Make it Less “Basementy”!
1) Architectural Mouldings
Low ceilings, columns and large spaces that need to be closed off for mechanical equipment are often unavoidable in a basement. By taking a more architectural approach to the space, you can help make it feel like an extension of the rest of the house. Consider the scale of the space when selecting woodworking components like mouldings and paneling. While a 6” baseboard and ornate crown mouldings might seem luxurious in the rest of your home, with a 7’-6” ceiling it will make the wallspace appear even shorter and seem like a fun house. Smaller, simpler woodwork can help create the illusion of more height. Perhaps forgo the crown moulding altogether.
Lally columns are about 3.5” round steel columns filled with concrete that support the structure. Sorry – they’re not going anywhere, so it’s best to work with them and not against them. If you’re creating different rooms, like bathrooms, bedrooms, or office spaces, they’re easy enough to hide inside a partition wall. If you’re trying to keep the space more open, you might want to consider using a knee wall between columns to help define space – perhaps even make it a bar top where kids can enjoy snacks with a countertop and a few stools. The wonderful thing about the permanent steel columns is while they are typically small, it’s sometimes better to enlarge them within the design to make them more visually appealing. Consider boxing them in to create the look of a more substantial architectural column – maybe it ties in to how your ceiling is designed. Add a bit of moulding detail at the top and a base, and you’ve turned that lally column from a firehouse pole into an architectural column that visually defines the space. Again, having an architect or designer to help guide you through this planning is certainly helpful!
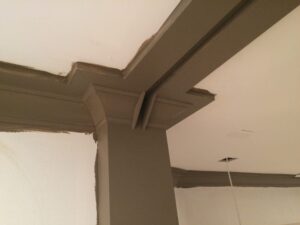
In the Greenwich basement remodel we opted to only have crown mouldings in the theater and music space. We painted them dark to highlight the lines architecturally which helped to divide the two zones visually. By applying pilasters to the wall we made faux beams that would help hide the drapery track and define one zone from the other.

These pilasters (what looks like a column up against a wall) were able to frame a wood paneled wall behind the theater area which made that segment of the space darker and more suitable for watching movies. This added architectural detailing not only helped us conceal the drapery tracks but visually defined the space and added much more flair to what would otherwise be a very long, narrow and bland space if left with plain painted walls.
2) Ceilings – To drop or not to drop?
To help guide your space planning and define different “zones” allow bulkheads or dropped parts of the ceiling to lead the way. Sometimes starting from the ceiling plan and making your way down to the floorplan can be a smarter method, so you don’t have large low bulkheads in the middle of an open area which will visually chop it up. Let areas that have lower ceilings be more intimate. If you have one or two long stretches of dropped ceiling, it might even make sense to do false “drops” in the ceiling, to create the illusion of beams or a coffered ceiling.
Talk to your contractor or property manager about what parts of the ceiling might need to be accessed for repairs and maintenance and what parts will likely never need to be touched. Depending on the mechanical layout of your home you might be able to drywall all or most of the ceiling of your finished basement. If having a grid ceiling where tiles can be easily removed and replaced for access is necessary — don’t fret! We’ve come a long way from the ugly acoustical tiles you remember from elementary school. With a variety of style options you can make your ceilings look impressive, even at lower heights. Armstrong, one of the leaders in ceiling solutions has some great designs for residential applications.
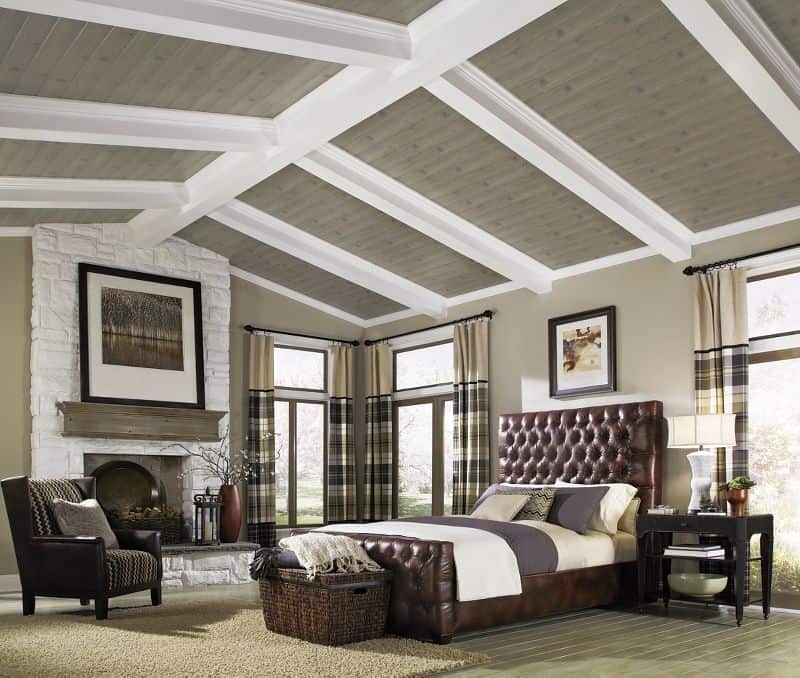
Options like these faux wooden planks work on a traditional grid system and can even be installed right overtop an existing grid. Colors like weathered wood, white wash, and even faux linen textures add high style.
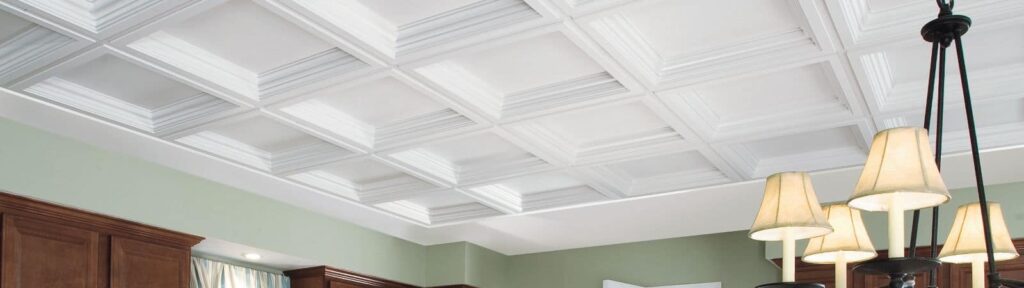
24”x24” deep coffered tiles add elegance and a ton of architectural flair with ease. These would really enhance a home theater or a billiards room.
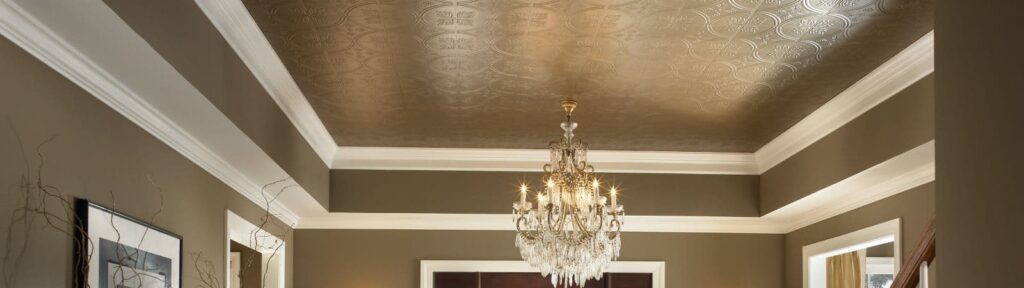
Tin tiles in a variety of finishes and designs add a touch of old world charm as well as function. Use these in a small area to really accent it, or through the entire space.
3) Flooring
Flooring is an important choice for basements. Hardwood is almost always a no-go. With frequent changes in moisture levels, temperature and being surrounded by all that concrete, it’s not a good place for a true wood that will expand and contract and be vulnerable to water damage. In most cases a floating floor will be the best type of system, and there are lots of great options. “Click in” luxury vinyl tile (LVT) is very durable and can come in a variety of high definition finishes, from wood look planks, to faux stone or concrete. Because the pieces click in together and don’t glue down, they can easily be removed if there is ever some sort of damage, and they also can be installed over a radiant heating system on floors if you want to feel extra cozy underfoot.

One of my favorite tile vendors, Tile Bar, is now offering LVT options. Here is a beautiful marble-look vinyl.
Rigid core flooring is very similar to LVT, but has a slightly denser, more rigid substrate. Where as an LVT allows for some flex, a rigid core flooring is going to give you more of that feel of hardwood, and even the louder, harder sound when walking underfoot.
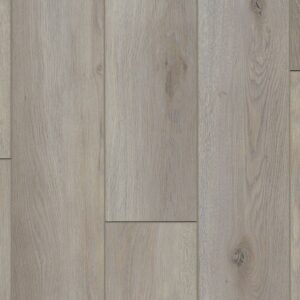
Rigid core flooring is available in a variety of high definition looks as images are printed on to an “image layer” and mimic the texture and grain of real hardwood. It’s also dent resistant and claims to be 100% waterproof.
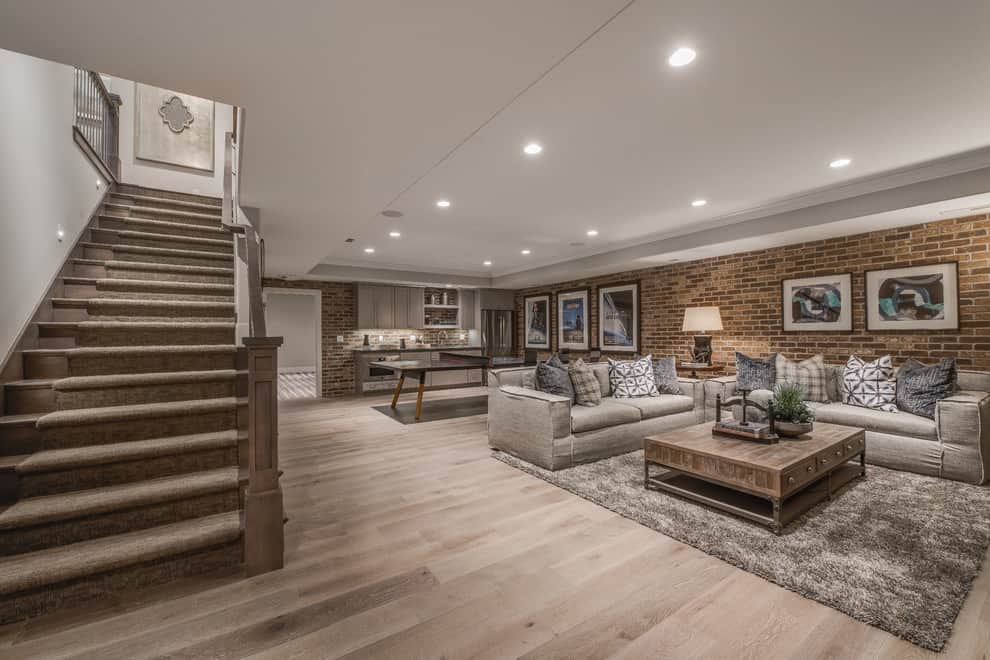
The wide-plank scale of these wood look floors make the space feel grand and cozy.
For spaces where acoustics and echoes may be more of an issue – like a home theater – wall to wall carpeting may be your best option. The soft fibers will help absorb the sound from escaping the room and reduce echo. Consider even upholstered walls or a textile wall covering to further help with this.
Carpeted floors and acoustical panels on the walls help absorb echo and give that cozy theater
feeling! I also love the details on this ceiling!
For a home gym, rubberized flooring may be ideal to handle the impact of heavy weights or machines and give some absorption to your joints for jumping, laying down, and adding comfort beneath a yoga mat. These can be installed as an entire flooring system wall to wall right over the concrete, or be placed over another flooring system if it’s only in a small area.
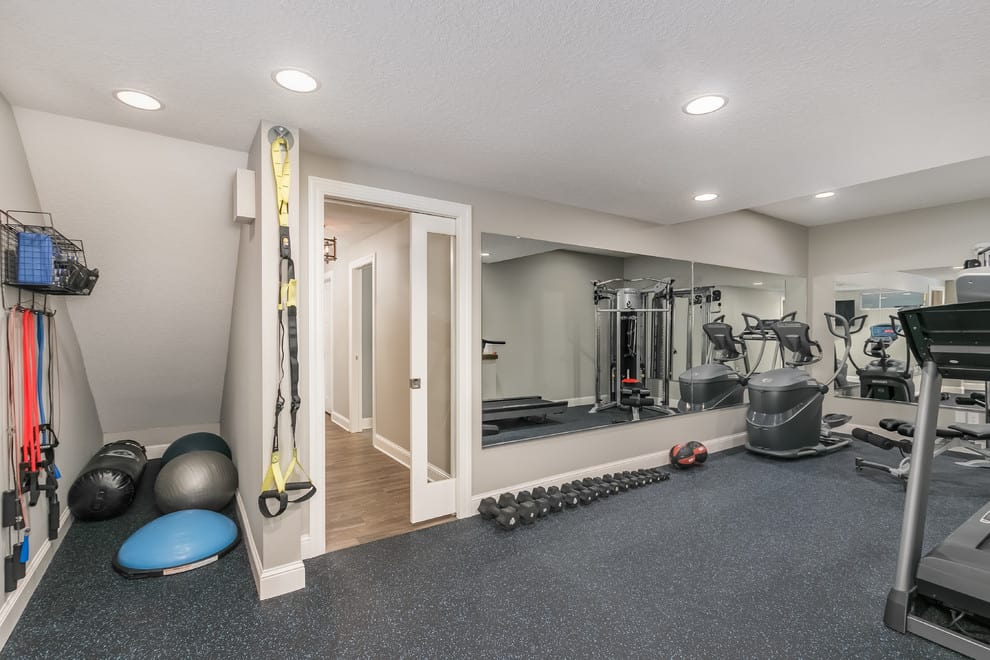
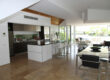
This rubberized flooring is wall to wall and transitions beautifully with the hallway. It certainly gives the feeling of a luxurious home gym.
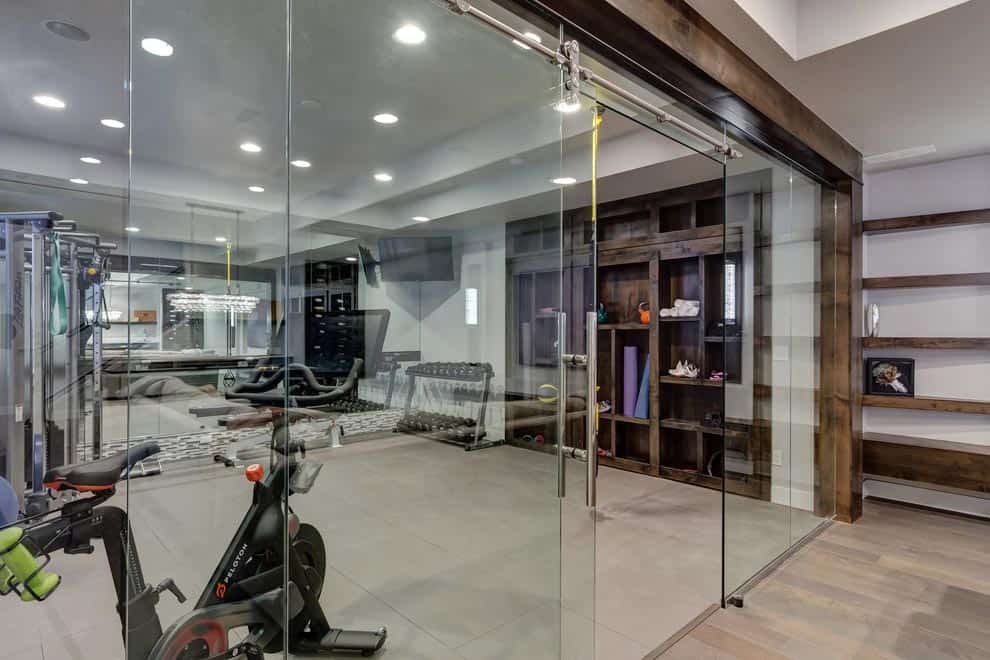
Love the look of this basement gym – it certainly looks like a sports club with the glass walls and rubberized tiles wall to wall that meet the wood look flooring.
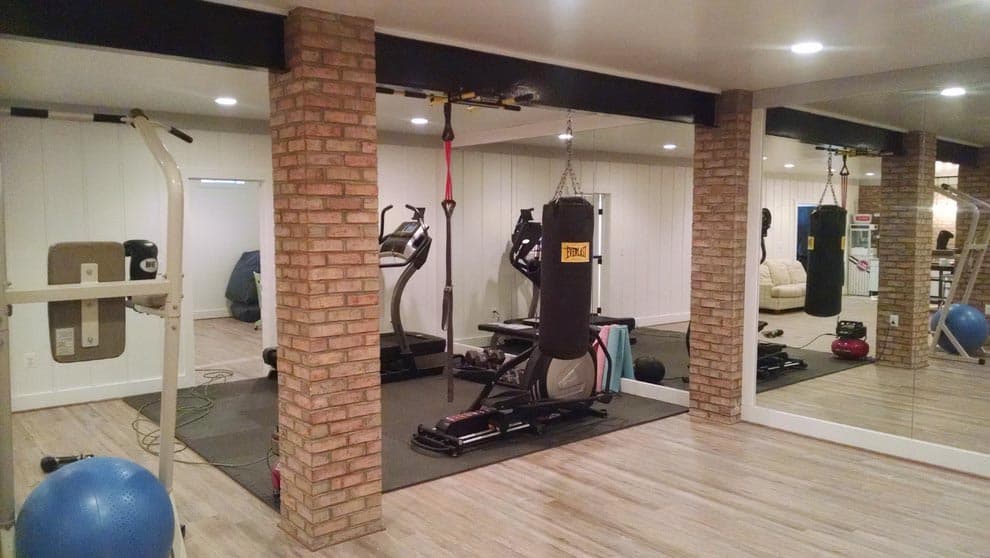
A few rubber tiles over an existing floor may be all you need to designate your exercise space!
4) Lighting
Lighting will play a crucial role in making the space feel bright, cozy and warm. Since most basements get little to no natural light, finding levels of artificial lighting to provide the most function but also create an ambiance is crucial. Finding layers of general lighting, task lighting and decorative lighting will help build a comfortable atmosphere.
If you have a multi-planed ceiling and are able to create some sort of a “tray” (where there is one definite shape at a higher level with a lower level creating a border) you might want to consider using some cove lighting. This indirect style of lighting uses thin LED tape to shine light up at the ceiling creating a warm glow around the border of the shape and also casts light down and into the space. This is simple to achieve yet adds a lot more style and ambiance than a grid of recessed lights.
Here we see two trays in the ceiling with cove and recessed lights. The recessed lights could be turned off to just let the cove light glow.
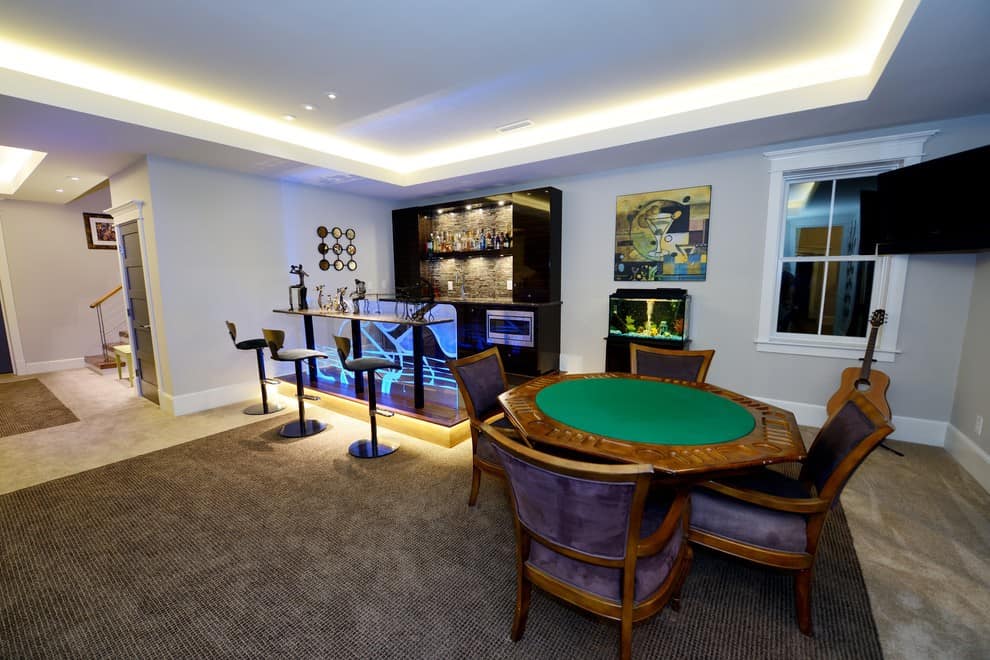
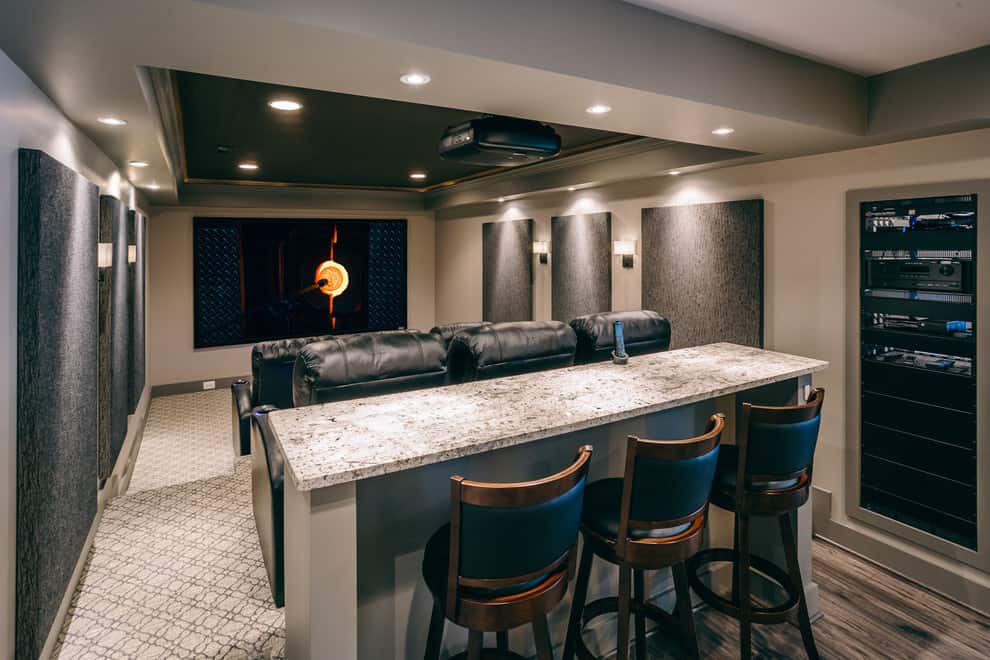
Another example of cove lighting that adds some flair to this game room. The detail is also mimicked in the bar area where the flooring level changes, adding style but also brings attention to the floor change to avoid tripping or falling!
Using decorative lighting can also help differentiate spaces. Certain fixtures can designate a billiards area with a pool table light, while a row of pendants could highlight a bar. These can be put on different switches to turn on and off separate from the general lighting. It also helps anchor a space visually!
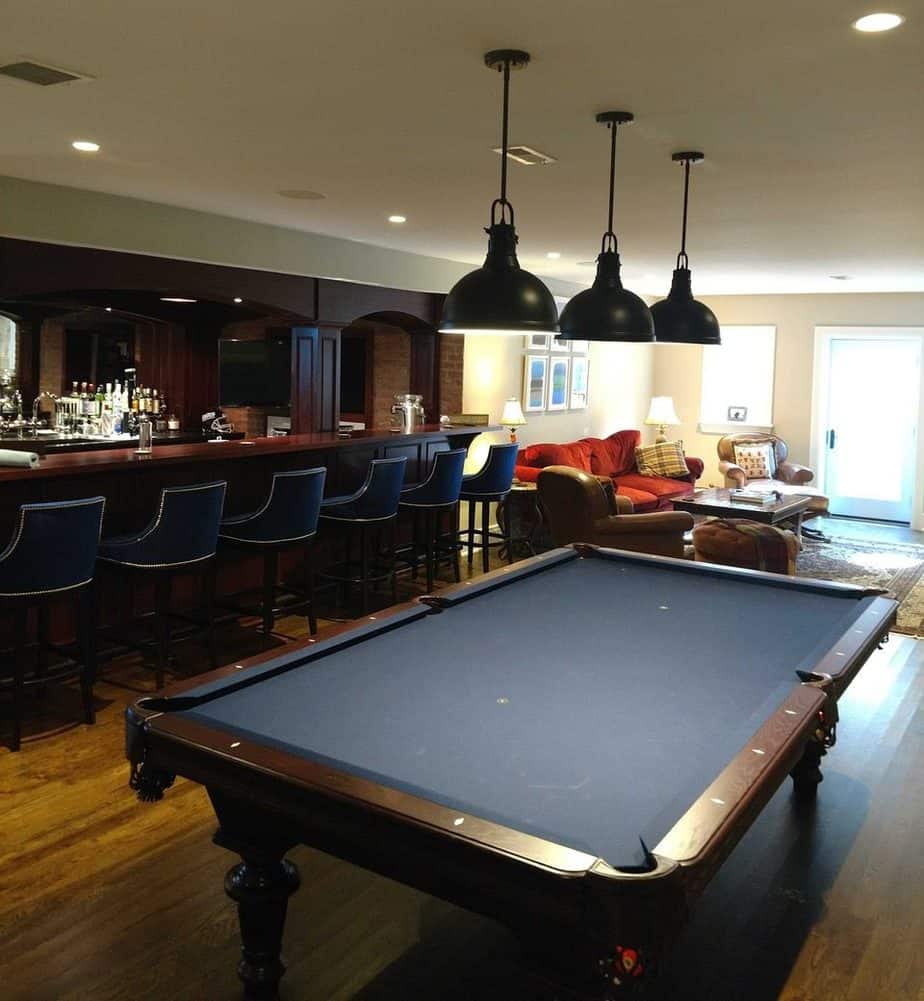
This pool table area is defined by the trio of pendant lights casting a glow of light directly onto the playing surface.

The basement uses recessed lights around the perimeter to provide general lighting, and then draws attention centrally with decorative hanging fixtures that help anchor focal areas and create different zones of activity.
In areas like home theaters, having small areas of dimmable indirect lighting can be helpful. You’ll want the space to be dark while enjoying the entertainment, but want some soft lighting so people can make their way in and out of the room while the general lighting is off. Using indirect lighting or lighting along the floor or any steps/level changes can be very important. As well as some sconces that cast light on to the wall and can be dimmed to provide very low non-distracting light.
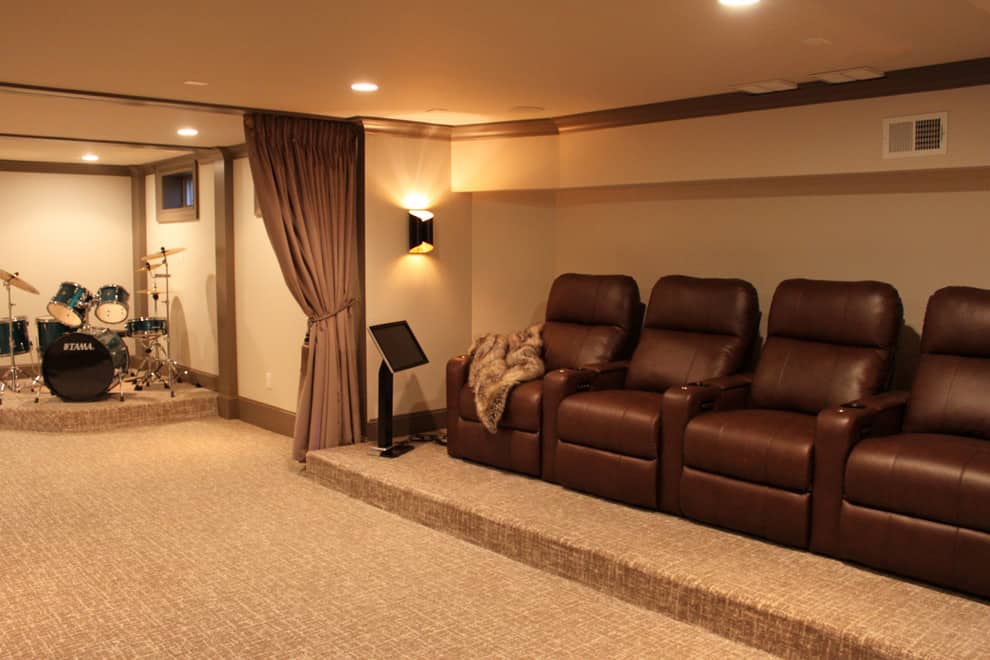
In the home theater area of this basement remodel we added sconces that washed the wall with light and put them on a dimmer. The general recessed lighting could be turned off and the sconces be put on the lowest level on the dimmer. I loved that the fixtures were made of black metal so the light could be directional. The brass finish of the interior of the shade kept the light in a warm yellow cast which is more comforting than a bright bluish light.
Don’t forget to check your temperature!! To avoid the dingy basement-y feelings of yesteryear be sure to avoid fluorescent lighting or any lighting that gives off a cool blue glow. Do not get tricked by bulbs or fixtures touting “daylight” color casting. Stick with bulbs labelled “soft white” or even better try to see the exact color temperature (this is measured in Kelvin units) I recommend to stay anywhere from 2700-3000K. This will give a warm soft light, the lower in number the more yellow, the closer to 3000K the more white, as you get higher that color turns more and more blue which is where most “daylight” bulbs tend to measure.
Ready to Get Started?
The basement can seem like a daunting space to finish or renovate, but don’t be afraid to explore that final frontier! Whether it’s creating a home office, a kids’ space where the mess can be tucked away, adding additional bedrooms or a gym – the possibilities are truly endless! Once you take advantage of this additional square footage that your home has to offer, it can truly help you fall in love with your home – especially if you’ve been feeling cramped or like you’re outgrowing your space. We’re here to help get you started. For a free consultation, call a HomeSquare Professional at 914-670-8100 or contact HomeSquare today!

Katie Canfield is the founder and principal designer at Studio KC. Studio KC got its humble start in 2015 when Katie was just 23 years old. While she was freelancing with other interior designers in the NY and CT area she also became a go-to designer for local contractors and trades that needed a designer’s help for their clients whether it be for custom cabinetry drawings or plans for a gut renovation on an entire home.
Katie Canfield’s design aesthetic is eclectic and flexible. She delights in the marriage between old and new- keeping spaces approachable but still matching each client’s unique aesthetic and family narrative. Her passion for design keeps her motivated and constantly on the hunt for new trends and materials. Her broad experience includes an art history background, study at the Accademia Italiana in Florence, a stint with the renowned Manhattan firm Amanda Nisbet Design, as well as collaborations with builders and designers across the tri-state area. She’s seen it all: from gutting prewar Manhattan apartments to new construction in the ‘burbs.